There’s a special kind of magic in the crispy, golden crust of tahdig-a beloved Persian treasure that turns a simple pot of rice into a culinary masterpiece. But when that coveted crust turns more burnt than beautifully browned, or worse, sticks stubbornly to the pan, panic can set in. Fear not, because rescuing your tahdig from the charred abyss isn’t as impossible as it seems. In this article, we’ll guide you through clever tips and kitchen tricks to salvage your stuck or burnt tahdig, transforming it back into a delectable delight that’s every bit as perfect as you imagined. Whether you’re a seasoned chef or a home cook discovering tahdig for the first time, these rescue strategies will help you reclaim the golden glory of your meal with confidence and flair.
Rescuing Your Tahdig: Tips for Burnt or Stuck Perfection
Rescuing your tahdig is an art that melds culinary science with a touch of patience and creativity. This beloved Persian dish, famous for its golden, crispy rice crust, offers a sensory celebration of texture and flavor. Originating from traditional Iranian kitchens, tahdig’s magic lies in the Maillard reaction-a chemical process that transforms simple starches into a crisp, caramelized masterpiece. As someone who has navigated the highs and lows of tahdig-making, I understand the frustration when it sticks stubbornly or edges just a tad too close to burnt. However, with the right knowledge and techniques, you can savor every last crunchy bit without dread or disappointment.
Prep and Cook Time
- Preparation: 10 minutes
- Cooking: 40 minutes
- Total: 50 minutes
Yield
- 4 to 6 servings
Difficulty Level
- Medium – requires some attention during cooking and gentle handling when rescuing
Ingredients
- 2 cups basmati rice, rinsed and soaked for 30 minutes
- 3 tablespoons unsalted butter or vegetable oil, divided
- 1/2 teaspoon ground saffron, dissolved in 2 tablespoons hot water (optional but recommended)
- 1 teaspoon salt
- 4 cups water
- 1/4 cup plain yogurt (optional, for crispy tahdig variation)
Instructions
- Parboil the Rice: Bring 4 cups of water to a boil with 1 teaspoon salt. Add rinsed rice and boil uncovered until grains are slightly tender but still firm (about 5-7 minutes). Drain thoroughly in a fine mesh sieve.
- Prepare the Pot: Heat 2 tablespoons of butter or oil in a heavy-bottomed non-stick pot over medium heat. If using yogurt for extra crispiness, mix it with 1 tablespoon butter and spread evenly on the pot’s base.
- Create the Tahdig Layer: Gently spoon a thin layer of rice over the butter/yogurt mixture and drizzle with a few spoonfuls of saffron water for color and aroma. Carefully mound the remaining rice on top without pressing down.
- Steam the Rice: Use the handle of a wooden spoon to poke several holes in the rice mound for steam to escape. Cover with a clean kitchen towel and lid to trap moisture and prevent condensation from dripping back onto the rice. Cook on medium heat for 5 minutes, then reduce to low and continue steaming for 30-35 minutes.
- Check for Doneness: Once the steam stops, lift the lid, remove the towel, and gently shake the pot. You should hear a crispy crackling sound from the tahdig layer.
- Gentle Separation: To separate stuck tahdig without breaking, place a wide spatula or plate inverted over the pot. Hold both together and flip confidently. If pieces cling, insert thin bamboo skewers or a butter knife between the layers and wiggle gently.
- Salvaging Burnt Layers: If bottom parts are lightly burnt, scrape the charred bits off carefully and serve the golden portions. For heavier burns, slice off the burnt layer and repurpose by crisping it in a hot pan with a splash of oil until fragrant-perfect as a crunchy garnish.
Tips for Success When Rescuing Your Tahdig
- Understand the Science: The golden crunch results from the Maillard reaction-avoid high heat at the start to prevent burning yet maintain enough warmth for caramelization.
- Use Heavy-Bottomed Pans: They distribute heat evenly and reduce hot spots, crucial for perfect tahdig.
- Oil Alternatives: Try mixing butter and vegetable oil for flavor and a higher smoke point combo.
- Strong Flavors: Infuse yogurt with minced garlic or dried herbs for a gourmet touch.
- Make-Ahead: Leftover tahdig crisps wonderfully in a skillet or oven; toast for 2-3 minutes before serving.
- Avoid Excess Moisture: Take care draining rice thoroughly to prevent soggy crust.
Serving Suggestions
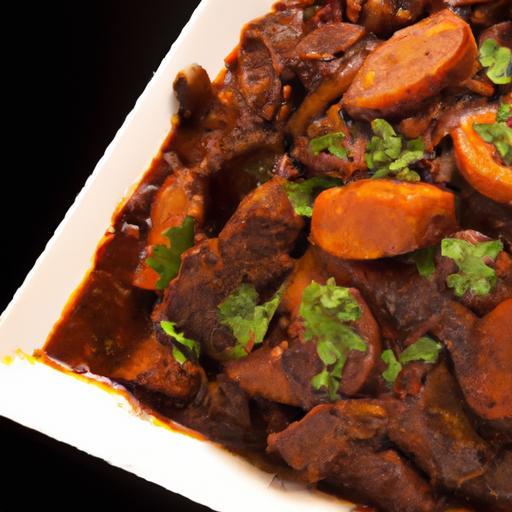
The golden tahdig shines beautifully atop Persian stews like Ghormeh Sabzi or chicken dishes. Garnish with finely chopped fresh herbs, a wedge of lemon for zest, and a sprinkle of barberries for a tart contrast. Accompany with yogurt cucumber salad or pickled vegetables to elevate your meal with textural interplay. Present tahdig on a rustic wooden board or a colorful ceramic platter to capture its golden allure visually.
| Nutrient | Amount per Serving |
|---|---|
| Calories | 280 kcal |
| Protein | 5 g |
| Carbohydrates | 58 g |
| Fat | 6 g |

For deeper insight into the science of cooking rice perfectly, visit Exploratorium’s guide on boiling rice. Embrace these tips, and your journey to mastering tahdig’s golden crunch will be filled with satisfying success and delicious discoveries.
Q&A
Q&A: Rescuing Your Tahdig – Tips for Burnt or Stuck Perfection
Q1: What exactly is tahdig, and why is it so beloved in Persian cuisine?
A1: Tahdig is the golden, crispy layer of rice that forms at the bottom of the pot during cooking. It’s the crowning glory of Persian rice dishes, cherished for its irresistible crunch and nutty aroma. The beauty of tahdig lies in its contrast to the soft, fluffy rice above-a perfect balance of textures that makes every meal memorable.
Q2: I accidentally burnt my tahdig. Is it ruined?
A2: Not necessarily! Burnt tahdig can often be rescued, or at least salvaged partially. If the charred layer is thin, you might gently scrape off the burnt bits and reveal a tasty, crispy treasure underneath. In some cases, soaking the pot in water can loosen the stuck rice so you can gently pry it off without ruining the pot or the tahdig.
Q3: How do I prevent tahdig from sticking too much in the future?
A3: Prevention is key! Use a non-stick pot or a heavy-bottomed pan and enough oil or butter at the start to create an even, slick surface. Lower the heat once the water evaporates to allow the crust to develop slowly without burning. Placing a clean kitchen towel under the lid helps absorb excess steam, keeping the tahdig dry and crispy without sticking.
Q4: What tools can help me release stuck tahdig safely?
A4: A thin, flexible spatula or a silicone scraper works wonders. Run a little warm water around the edge of the pot first to loosen the rice, then gently ease the spatula underneath. Avoid aggressive scraping, and instead use a patient wiggle-and-lift technique to coax the tahdig free, preserving its golden structure.
Q5: Can I save burnt tahdig by repurposing it?
A5: Absolutely! Don’t toss it out-burnt tahdig can be crumbled over salads, mixed into stews for a crunchy texture, or turned into savory snacks with herbs and cheese baked on top. Sometimes, creative rescue leads to delightful new dishes that become family favorites.
Q6: Are there alternative methods to make perfect tahdig without the risk of burning?
A6: Yes-try layering thinly sliced potatoes or flatbread (lavash or tortilla) at the bottom of your pot before adding rice. These form a protective barrier, creating a deliciously crispy base that’s easier to lift and less prone to burning. This trick offers a flavorful variation on classic tahdig while minimizing the sticking problem.
Q7: What’s the ultimate secret to achieving that flawless tahdig every time?
A7: Patience and balance. It’s all about steady heat, generous oil or butter, and respecting the rice’s cooking time. Listen for the gentle crackling sound-this means the crust is forming. Resist the urge to rush or stir; trust the process, and your tahdig will emerge golden, crunchy, and perfect every time.
Closing Remarks
In the delicate dance of creating the perfect tahdig, a little singe or stubborn stickiness can feel like a culinary tragedy-but with these rescue tips in your toolkit, it’s simply a chapter in your cooking adventure. Whether you’re coaxing the golden crust free or reviving the cherished crunch, remember that every imperfect tahdig brings you closer to mastering this beloved Persian delight. Embrace the science, trust the techniques, and soon enough, your next tahdig will emerge from the pot as a flawless treasure-crispy, fragrant, and utterly irresistible. So don’t fret the burn; instead, see it as an invitation to perfect your craft, one delicious step at a time.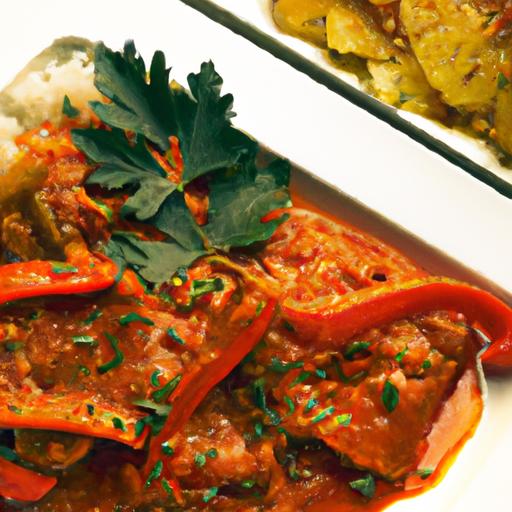


